Wouldn’t it be nice to just create something and publish it? Oh, the dreams we can dream, right?
Editing Instagram Reels isn’t as hard as you might believe. Recently, I conducted a workshop and this was one of the topics. I thought I’d share the basics with all of you as well.
The editing comes in after you have recorded new content or uploaded clips you already have or have found. Instagram itself has creative editing tools built into the platform that make it easy to edit.
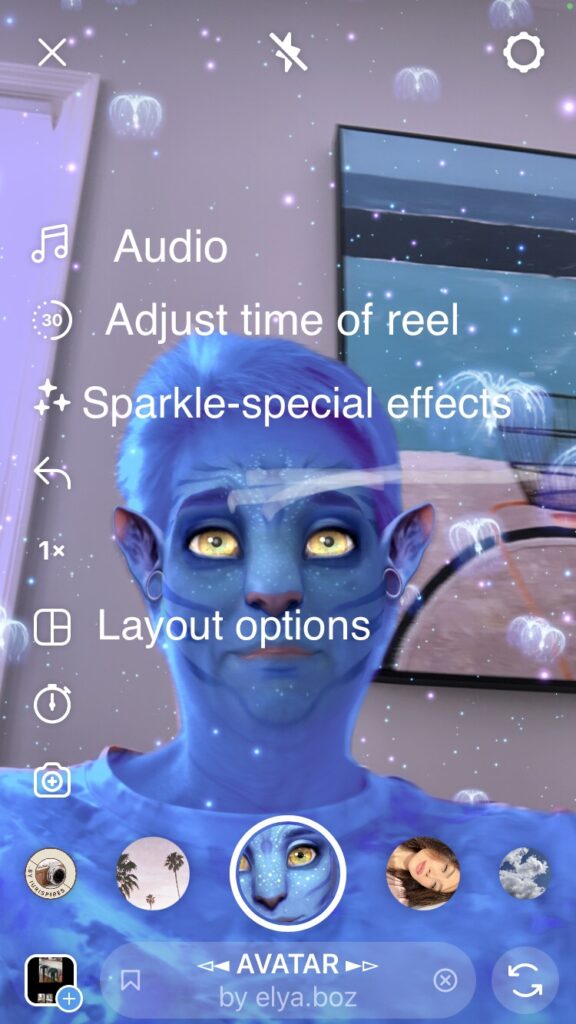
Be sure to set filters, effects, speed and audio before recording. It defaults to 15 seconds, so change it if you need it longer. (Icons will be on the side, top and bottom of the screen.) Yes, you too can be an Avatar!
Editing Reels:
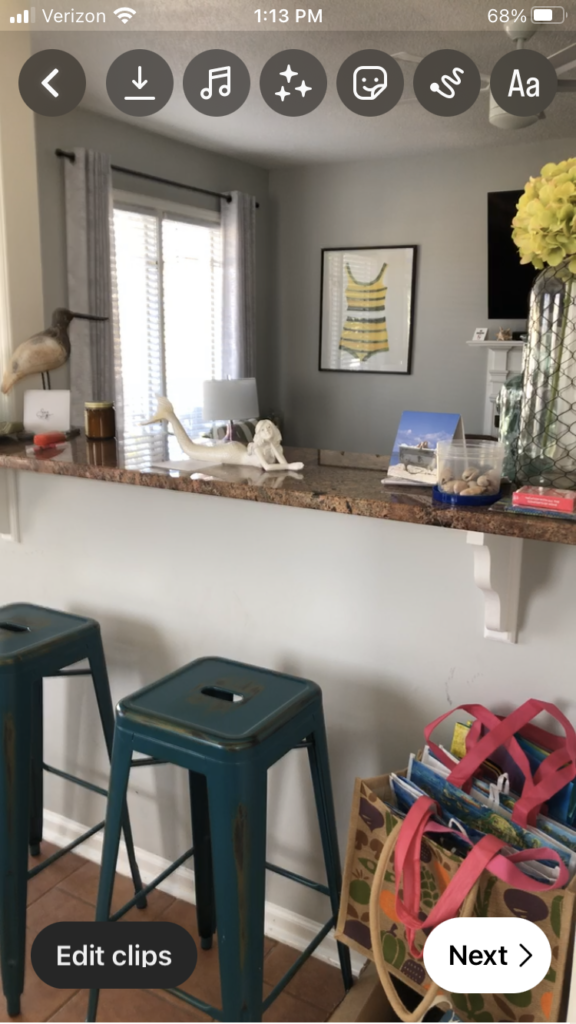
Trimming and adjusting the timing and length of the clips might be needed:
- Tap the left arrow to edit clips and then select the clip you want to adjust.
- The scissors icon can trim the beginning or end of a clip. (Not all versions will have this feature, but the edit clips at the bottom allows you to shorten the length of video. Slide it left or right to change where it starts and stops. Saving it will create a new clip.
- Tapping the trashcan icon will delete a clip.
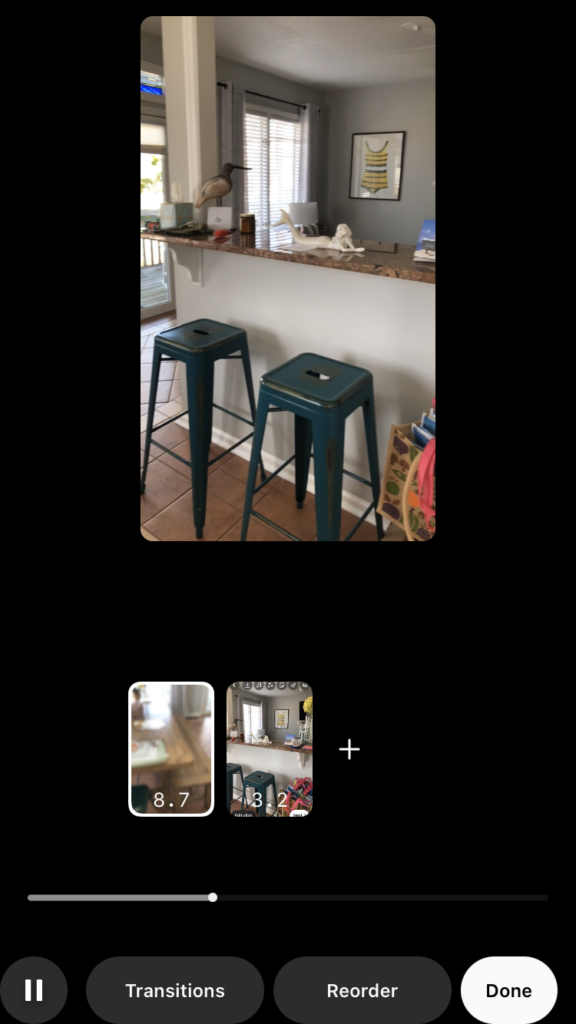
Reorder or changing the positions of the clips:
- If you have more than one clip, you’ll see Transitions and Reorder at the bottom of the page. Drag the clips back and forth to reorder them.
- Clicking the sparkle icon allows you to create a transition between the clips.
Make it fun:
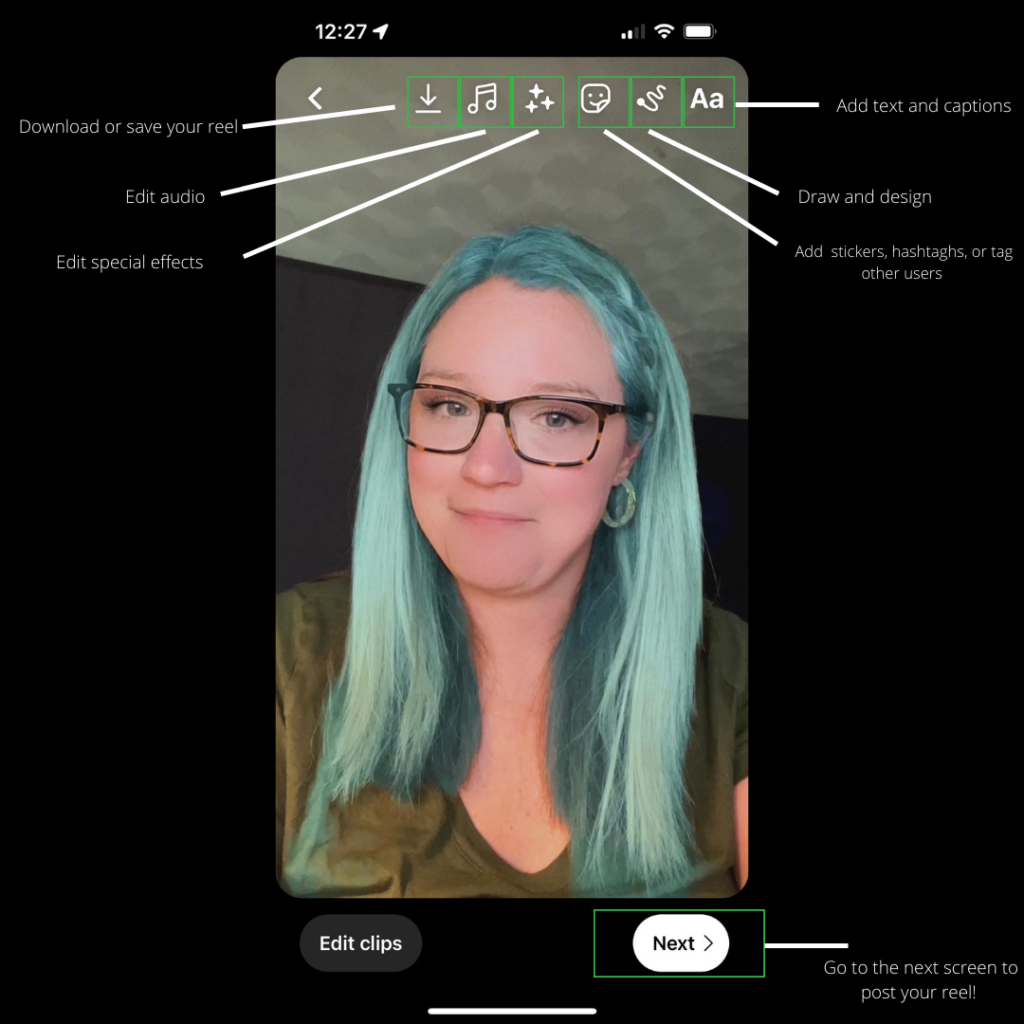
Now click on the icons at the top of your Reel and have some fun.
- Add stickers (for polls, questions, quizzes, and more), hashtags, and tag other users and accounts.
- Adjust audio by clicking on the music note icon. You can select music from the library, upload and use original audio and do voiceovers by tapping the microphone to record your audio.
- Explore and use filters and special effects (sparkle button). You’ll have less options than you would if you used filters during filming, but you will have fun options.
- Add text to your reel for readability. Clicking on the Aa icon will get you to text. There is a moving text Aa icon that will allow your text to do different animations. Use the keyboard to type, find fonts, and colors.
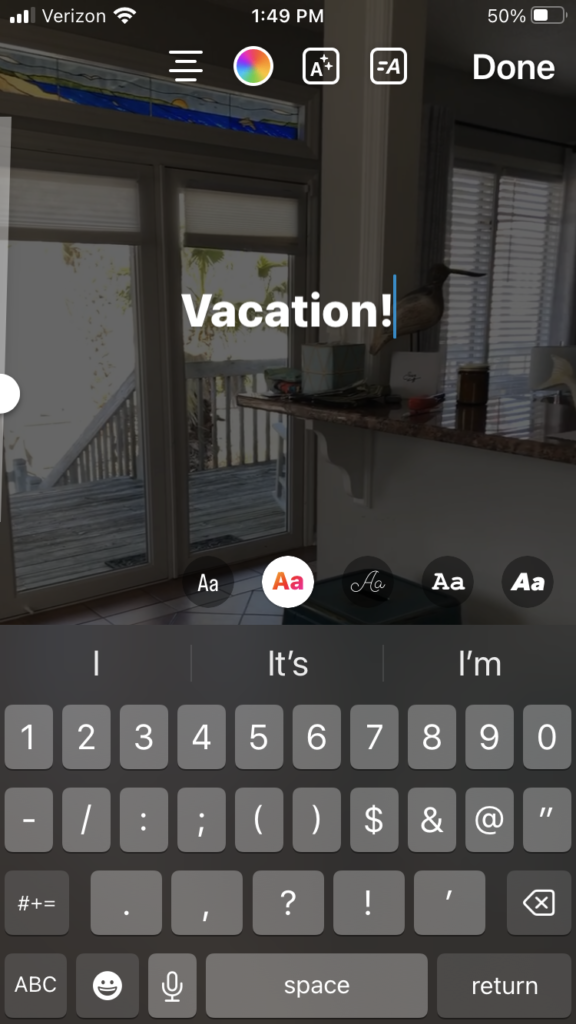
- The line icon allows you to draw on the Reel.
- Fine tune all aspects of your Reel and to save the Reel.
- Upload a cover and a caption while on the publish screen.
- Click “next” to share your Reel to Instagram and Facebook if you choose.
Your Reel is posted, and you discover a mistake. Now what? While you can’t go in and just edit, this blog shares some work arounds to help navigate the changes you might need to make. https://www.flexclip.com/learn/how-to-edit-reels-after-posting.html
If you don’t want to edit Reels from Instagram, here is a link for editing apps you can try.
https://later.com/blog/best-app-for-editing-reels/
If we can help you with anything reach out to us! Have fun creating Reels!